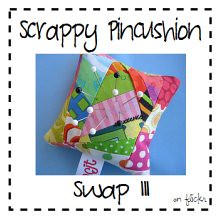
I can do a tutorial of my own as I took step by step photos and still screwed it up! I learned tough, ladies, as usually when I screw up anything crafty, I lovingly set it aside and forget about it. I percevered on this puppy and am pleased with it but it is too small for my sewing supplies. This can only mean I will have to make another one. When I do, I vow, VOW to use matching thread! I am usually too freaking lazy to change the thread. I tell myself I like the 'handmade bohemian' look but it would be just that much better if it all matched, I know!
I must mention Nima over at Made to Treasure for inspiring me and on her site, I must mention and thank all these three ladies, Penny at Penny's Hands and Tommy at The Material Girl and Nima being the third, for their tutorials. I still struggled as I realized that I am a by the 'book' person, if you will. When you leave a measurement up to me, I make a mistake! THINK ALIA, THINK! It was fun and here are the pics...
First I tried to cut out a 14" circle. I couldn't get my protractor to go that far so settled for a 12" circle.
Ok. I'm not the brightest nail in the tool box but this way worked for me. I needed a little bit more than the two ladies' tutorials gave. So, I made a circle almost 8" or 2" smaller. I labeled everything like a good girl only to have to cut it out!
These were my fabric choices but in the end; I omitted the light purple. I did not like it with the green.
I had to iron my fabrics! You can see some of my larger scraps folded and waiting to be used.
Here I traced the circle from the template. I doubled up the fabric once I omitted the light purple and needed another fabric for the lining of the pockets.
I marked the six pockets. Then I cut them out with scissors.
Here is Uki under my sewing table having a snooze in her Build A Bear bed! You can see her Soft Paws on her claws. Those things are life savers on our person and furniture!
I then pinned all around the pocket pieces and even drew 1/8" marks. I went ahead and left that but on the bigger circles I sewed in at 1/4" and it was easier and I think sturdier. I had forgotten about right sides together but lucked out here as this was the same fabric on both sides and a solid.
Yep, I got myself and one can't have to much fun in her studio without bleedin' a bit!
The green turned out gloomy and dull. You'll see how bright it really is! I did the same here as above.
This fabric lining came out blue! BLUE!! It is meant to be a dark purple like below! Strange! I made slits in the middle and turned out the right sides.
I then folded and ironed to get the center and six compartments.
Aw man, I realized that I did not turn these fabrics around and had to rip out the seams. I turned the fabric right sides together and then sewed in at 1/4". Then I realized that I forgot the buttonhole. I couldn't figure it out and therefore made two eyelets they were T I N Y!
This is when I realized that I should use matching threads. I could not figure out how to make a buttonhole and had spent too much time so I chose an eyelet. I sewed two lines to make a channel for the ribbon.
I cut three layers of Dream cotton batting and realized that my pockets were not deep enough so I took it all apart. I only put two back in. I also found some darker purple thread that really made a difference!
See, you can really see the white thread. It is ok but would have been better with a more blending in type of color! Here it is pulled together and I was disappointed that it was too small! Nevermind, I will be giving it to my daughter for a stocking stuffer! Now, to come up with something for my son...
This is the inside, empty!
Thanks for having the patience for this long post!
EDITED TO ADD THIS PHOTO THIS MORNING!
EDITED TO ADD THIS PHOTO THIS MORNING!
I filled my little 'jewelry caddy' with the jewels I had sitting around. On the top left I have my two black heart earrings from St. Louis and way back in my Siouxsie and the Banshees days and then I have three gold rings below that and then you can see my kick butt gold bangle and the silver necklace is my Brighton purchase for myself over the summer in Cleveland, OH! I'm still gonna give it to my girl!


12 comments:
Wow, your sewing/jewelry caddy is beautiful. Your daughter will love it.
I'm posting about your guild meeting today on the Selvage Blog.
Enjoying your blog. Isn't it fun to make the one-patch quilts? Seeing your photos makes me want to get right to the sewing machine and get to work on one.
Alia I have just come over from Salvage Blog to visit your amazing blog.
Your little bag is just lovely and the colours are great.
Your guild has made some of the most amazing quilts. Really enjoyed reading your blog and I would love to become a follower. E-mail me please if that is okay.
http://maria-lifeontheblick.blogspot.com
Thanks for your visit Alia. Your jewelry caddy is gorgeous. The colours do go well together !
wow..that looks awesome alia...i love the fabric choice...great work...
Karen: Thank you and I have been over to your site!
I know, I was showing both 2.5" scrap quilts to the ladies at Hardanger and am stoked to get them done! I pretty much have a plan in my head. Stippling for the pastels and wavy lines for the colorful one! Border of white and lavendar and other colors in my stash if I have (thanks Maya) and no borders but at least one more row for the colorful one! whew!
Maria: Thank you. I will em you but I have an em button on my blog. In case you did not see it. I'll come on over to side too!
Penny: Thank you.
Nima: Thank you too.
Now if I can just figure out how to make it bigger without a protractor!
Alia, shuriya for your lovely comments in my blog, I love you jewel bag and wonderful tutorial. Great colour combo. I will visit again to see your new projects.
ciao
I found your blog on Selvage blog, it's very interesting and thanks for the tutorial.
I love your quilt and the colours you have chosen
ciao ciao
Your tutorial brought back membories! I use to help a neighbor make these for a childrens hospital. We would do Christmas fabric and fill with candy. The kids could then use however they wanted.- cw
Daffy: Thank you!!
Teodo: Ciao Bella, grazie!!
Cheryl: Wow, what a great idea! Thanks!!
Loved this sewing caddy and with a tutorial too! Thank you so much will definitely have to try it out!
Thanks for linking to Sew Crafty Saturday
awwwe :) u can keep it tho, ur stuff looks awesome in it!!! :D i wanna make my own this break!!! (i just hav to add it to the LOOOOOONG list of things to do this comin week!!!) ;)
Mayya: Thank YOU!
Amu: OMG! YAY! My daughter is on this finally! So you come by and read I wanted to give this to you huh? We will make one this next week! YAY!!
Post a Comment